
Choose giant octopus lantern displays by deciding where visitors should be in relation to the form. A centerpiece is composed around viewing positions beside the display; a walk-through design is composed around a passage. Both choices need a clear view of the full arm spread and its relationship to the venue. Head height alone cannot show how far the form extends or how it will look from the planned approach.
Choose the Octopus’s Role in the Space
A Centerpiece Seen from Beside the Path
A centerpiece gives the octopus a defined display area, with visitors looking toward its head and spreading arms from a viewing edge. The face and curls can be composed together for that view. This is a useful starting point when the venue has space beside a path for a subject that visitors can stop to observe.
Viewing from several sides is a further requirement. State which sides matter so that a strong front view does not stand in for the entire form.
A Walk-Through Design
A walk-through design puts the passage within the composition. Show where visitors would approach, pass beneath or between the forms, and leave. The position of each raised or curled arm then needs to be read against that passage.
| Compare | Centerpiece | Walk-through design |
|---|---|---|
| Visitor relationship | Viewed from a stated edge or confirmed sides | Approached and passed through along the proposed path |
| Extent to show | Full arms, base and scenery, plus viewing positions | The same display boundary, plus passage and connections at both ends |
| Main visual check | Head direction and curls as seen from the viewing position | Approach, raised arms and path together |
| Venue information | Available display area and nearby objects | Intended travel direction, existing path edges and nearby objects |
The project team and appropriate professionals must confirm actual passage conditions and site suitability; an opening visible beneath an arm does not establish either.
Compare the Full Arm Spread
The full outline is more useful than head height for understanding where an octopus ends. On a top view, mark the farthest arm tips, the base and any scenery edges. Show the space the venue intends to leave for people separately, so it is easy to distinguish the display from its surroundings.
For example, two concepts with similar head heights might use very different curls: one spreads outward across the ground, while another turns upward. Their lateral boundaries on the drawing would differ, even though their headline heights look comparable. Check the maximum extent in each relevant direction on the design drawing.
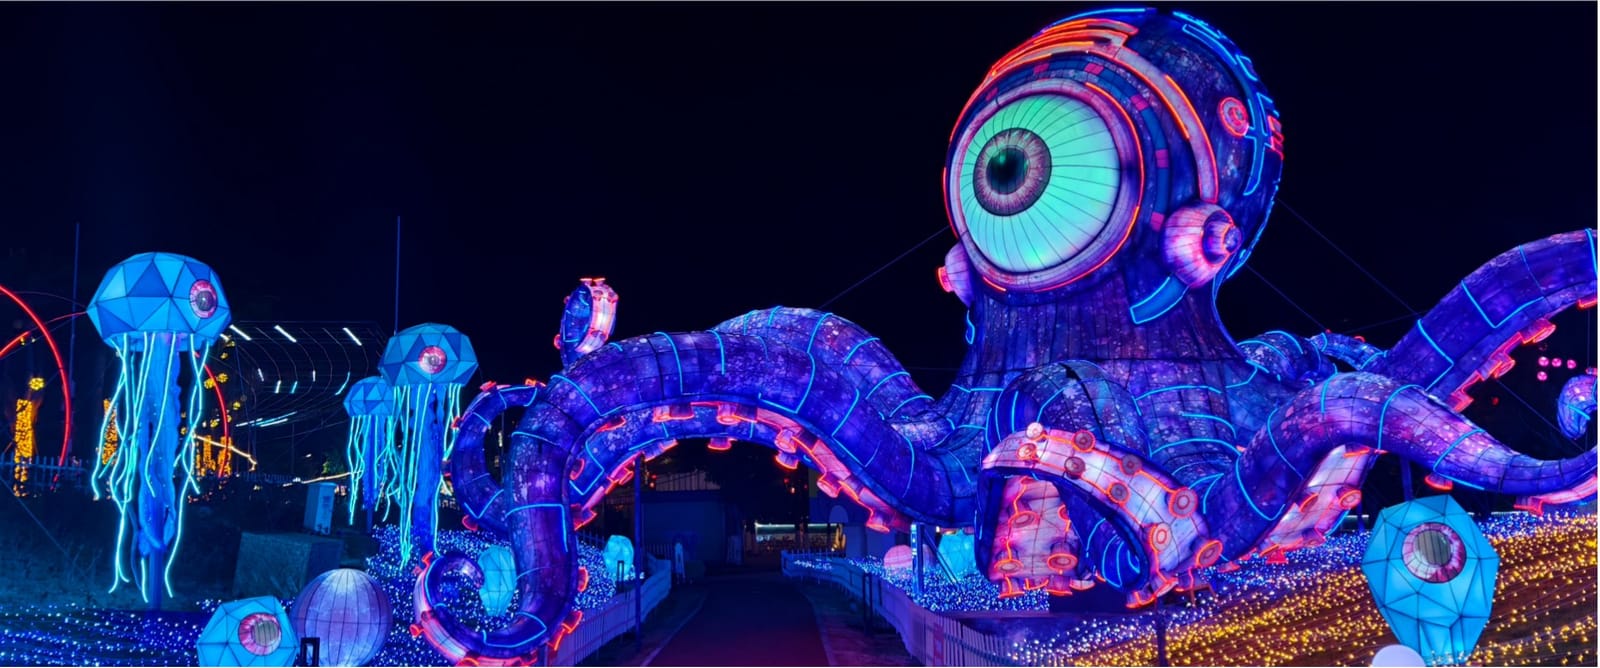
The example image shows why a complete view matters. An arm on the right continues beyond the frame, so that edge of the image cannot define the display boundary. A wider composition drawing is needed to understand the whole form.
Review the Same Design from Three Views
Front view: Check how the head, eye and arms read together. Notice whether a curl overlaps an identifying feature or whether the head faces away from the viewing position. This view establishes the main visual impression.
Oblique side view: Follow the projecting and curling sections. An arm that looks separate from the head in front may overlap it from the approach angle. Compare those sections with the proposed path shown on the same design.
Top view: Trace the complete outer edge and its relationship to the available area. This is where the widest spread, nearby objects and passage can be compared together.
Use all three views from the same design revision and match them to the same venue plan. If visitors would approach from either direction, review both approaches rather than relying on the stronger one.
Match the Concept to the Available Space
An independent area beside the route gives a centerpiece a place to be viewed without making a passage part of the octopus itself. Compare the main face and spreading form with the viewing edge you have identified.
If the proposal incorporates an existing walking path, compare a walk-through composition against that path's boundaries and direction. Mark trees, site edges and neighboring displays on the same plan; their positions may change which curl or head orientation makes visual sense.
Keep this selection focused on the octopus's role in that location. For the wider sequence of scenes along a route, explore light trail planning.
Keep the Octopus and Its Scenery Separate in the Brief
List the octopus form, its base and the neighboring figures separately. In the example image, other illuminated forms stand beside the path, while the blue-purple octopus and its prominent eye provide the main subject. The surrounding forms help compose the image, but their presence does not define what belongs in a single-display request.
Specify which items you want to discuss and where their combined boundary falls. Broader ocean animal display ideas belong to the next level of scene planning.
Questions to Settle Before Choosing
Is the head height enough to compare two designs?
No. Compare the full arm outline and viewing directions as well, using the top view to see the complete spread.
Can an octopus display be viewed from all sides?
That depends on the design. Review the side and rear appearances for the viewing positions you intend to use; a front image describes only that view.
Do curved arms mean the display moves?
No. A curved shape describes appearance. Any desired movement is a separate requirement to establish and verify for the project.
When exploring custom animal lantern displays, bring the viewing direction, a complete octopus reference, venue photos and a plan showing the available display area. Together, these let the discussion focus on the form and spatial role you want, whether that is a centerpiece seen from the path or a passage within the composition.
Post time: Nov-06-2026


